How to synthesize a bold font
Note: If you just need the instructions, you can jump to the quick guide below. The rest of the post is just an outlet for my verbosity.
A first attempt…
The typeface I use on my blog is ABeeZee, by Anja Meiners et al. I like it very much, and it ticks all of my boxes: easy to read, beautiful letterforms, with personality but not too distracting. Other nice touches are the hand-made italic and the fixed-width digits. ABeeZee was designed to be a children’s learning font: not a usual choice for a technical blog – a reader has asked me why my articles are written in Comic Sans – but I’ll stand by my choice.
The only relevant problem about ABeeZee is that it lacks font weights. It does not even have a bold variant: I can blacken text in my pages only because browsers artificially create a faux bold if necessary. However, since the browser’s algorithm is not aware of the font specificites, it is also very prudent, and the synthesized boldface it creates lacks weight. Have you noticed that the words “Comic Sans” in the previous paragraph are bolded? Maybe you did, but they sure tend to blend into the surrounding text.
As I was renewing my homepage and making adjustment to other content, I started to feel the need for an eye-catching black variant. Ms. Meiners is selling the complete font family but, first, I found out too late about this, and second, I would not want to start a commercial negotiation anyway: the font has no listed price, one needs to contact the seller and get a custom quote. Thus eliminated the “buy” part of the make-or-buy decision, the only option left was to create the boldface in-house.
I first searched the web for a site offering the service, but found nothing. My next approach was to use an LLM. I started Claude Code with the free model deepseek-v3.1:671b-cloud and asked it to produce a Python script to bolden a font. The model was happy to comply. This is what the first attempt produced:
- Regular font:A wizard’s job is to vex chumps quickly in fog
- Browser-made bold:A wizard’s job is to vex chumps quickly in fog
- Script-generated bold:A wizard’s job is to vex chumps quickly in fog
It does not seem very black, does it? The Python script was able to edit the font, as the adjusted glyph spacing shows, but it failed to thicken the strokes. I thought that a couple of iterations would solve the problem, so I happily continued the AI session. The result of an hour of conversation was a series of scripts that displayed some naming creativity,
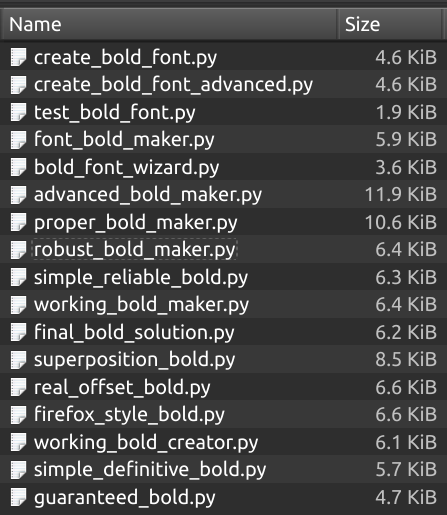
but failed exactly like the first attempt.
…and a second one
I closed Claude and tried my luck with DuckDuckGo again. This time, the search engine pointed me to the beautiful free book Design With FontForge, which stated that FontForge could do what I wanted in a really simple way:
Creating a bold version of a font can be rapidly approximated by running a filter called Change Weight (which you will find in “Element ⇨ Styles ⇨ Change Weight” menu) to add weight to your glyphs.
I tried the program and, wonder!, it did what it promised: the “Change Weight” required setting some options,

and acknowledging a long list of warnings I was too ignorant to fix,
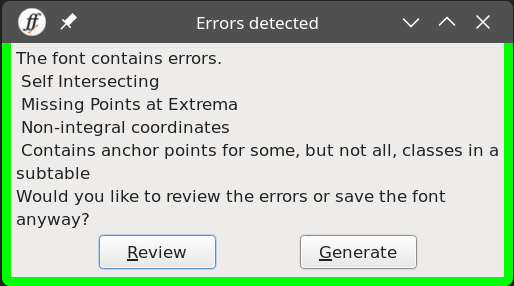
but it did the job! Well, maybe my initial choice of 75em was too bold (sorry for the horrible pun)…
I experimented with various weigths till I found at 35–40 em the thickness I was looking for. The resulting glyphs came out good, but there were some problems.
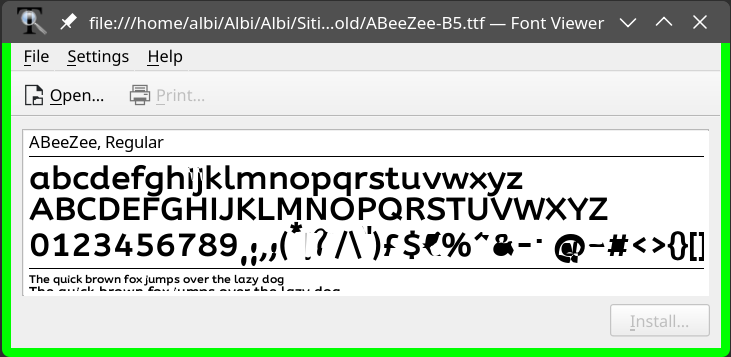
First, KDE Font Viewer did not like the generated ttf, displaying corrupted glyphs (see the ‘ i ’, the ‘ j ’ and various typographic signs).
Second, neither of the options for the counters produced a letter spacing I liked:
- Regular font:A wizard’s job is to vex chumps quickly in fog
- Browser-made bold:A wizard’s job is to vex chumps quickly in fog
- FontForge, 35em, “Retain”:A wizard’s job is to vex chumps quickly in fog
- FontForge, 35em, “Squish”:A wizard’s job is to vex chumps quickly in fog
Windows users: your platform is probably showing distorted glyphs. This is what you’re supposed to be seeing. Don’t worry, your problems will be addressed in the following!
With “Retain” the font appears too wide for its height. “Squish” has the opposite problem: look how the two final letters of “quickly” seem to slot together like jigsaw puzzle pieces.
But the solution of the problem was at hand: to fine-tune the letter spacing, just use one of the vibe-coded scripts of before! After a quick parameter tuning,
python3 create_bold_font.py ABZ-40em-Squish.ttf -s25
the resulting font came out with a decent-looking spacing.
- Regular font:A wizard’s job is to vex chumps quickly in fog
- Browser-made bold:A wizard’s job is to vex chumps quickly in fog
- Final product:A wizard’s job is to vex chumps quickly in fog
The font might seem almost identical to the browser-generated one, but the added weight makes a difference. Using it, a bolded part stands out.
The final version
The font appeared ready to use, but the KDE Font Viewer seemed to think it came from Mordor:
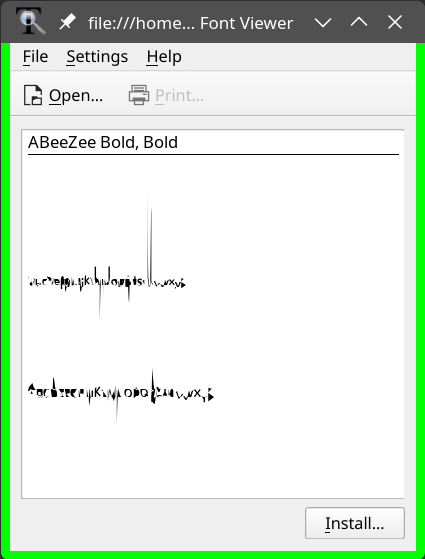
I would have tolerated the problem, but my fellow Stunts racer Dreadnaut made me aware that the typeface appeared horribly distorted on Windows too:

I guess I should not have ignored so nonchalantly those list of warnings from FontForge. Fortunately the program has other beginner-friendly functions. After selecting all the glyphs again, with the help of the handbook, I ran the menu options that more look like auto-fixes: “Element ⇨ Correct Direction”, “Element ⇨ Round ⇨ To Int” and “Element ⇨ Overlap ⇨ Remove Overlap”. The result seems unchanged to me,
- Pre-fix:A wizard’s job is to vex chumps quickly in fog
- Post-fix:A wizard’s job is to vex chumps quickly in fog
but on Windows, I’ve been told, the difference is night and day. For the joy of my Windows-based fans, here is also a bolded part with the fixed variant.
All’s well that ends well, then? Unfortunately I’m not so convinced. Though the faux bold looks good at first sight, after putting it on my front page I felt some of the grace of the original typeface had been lost. For this reason I decided, regretfully, to put it back in my toolbox. Maybe it will come in useful in future. But it was a nice learning experience!
Downloads
Here the original font and the best-looking synthesized bold:
Both fonts are made available under the OFL-1.1 license. I have renamed the bold variant “ABZ” to comply with it. As a reminder, the real ABeeZee Bold is available commercially under the name “ABeZeh”.
Thanks to Dreadnaut for the Windows fix!
Quick guide
Here a step-by-step description of the process.
- Download FontForge and open your font in it.
- Select all glyphs (
CTRL+A). - Click on “Element / Styles / Change Weight”.
- Choose your options. For my font this worked:
- Embolden by 40 em
- LCG (= optimize for European scripts)
- Counters: Squish
- Cleanup Self Intersect
- Click on “File / Generate Fonts…”
- Choose a filename, click on “Generate” and dismiss the warnings.
- If the glyphs are too compressed:
- Download this Python script to increase the letter spacing
- run it, e.g. with
python3 create_bold_font.py your-font.ttf -s 20
- Play with these parameters until you get a result you like:
- FontForge’s “Embolden by … em” to add/remove weight.
- The script’s “
-s” parameter to adjust the spacing.
- When you have a version you like, reopen the result in FontForge.
- Select all glyphs (
CTRL+A) again. - Press
CTRL+SHIFT+D,CTRL+SHIFT+_andCTRL+SHIFT+Oto perform the autofixes (respectively: correct direction, round to int and remove overlap). Be advised that Design With FontForge offers a more thorough list of sanitizations. - Optionally click on “Element / Font Info” to customize the metadata.
- Click on “File / Generate Fonts… / Generate” and save your final
.ttf.